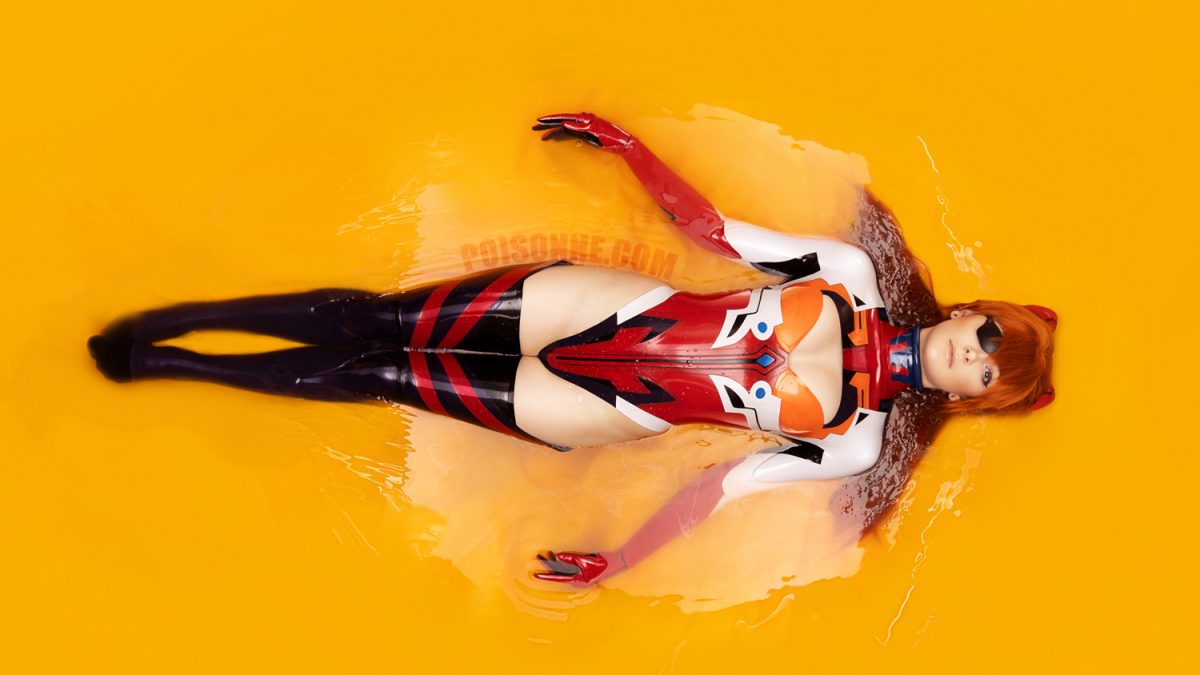
Here’s What We Learned!
So as you might know, I used to travel quite a bit — I think in 2019, I was gone at least once a month, for conventions, and shooting cosplay, and doing performing gigs, and that also gave me a lot of options to shoot in new and exciting places. But, it’s a global pandemic, so I’ve been trying to figure out how to do new and exciting things without leaving my house and/or city until I feel safe travelling again!
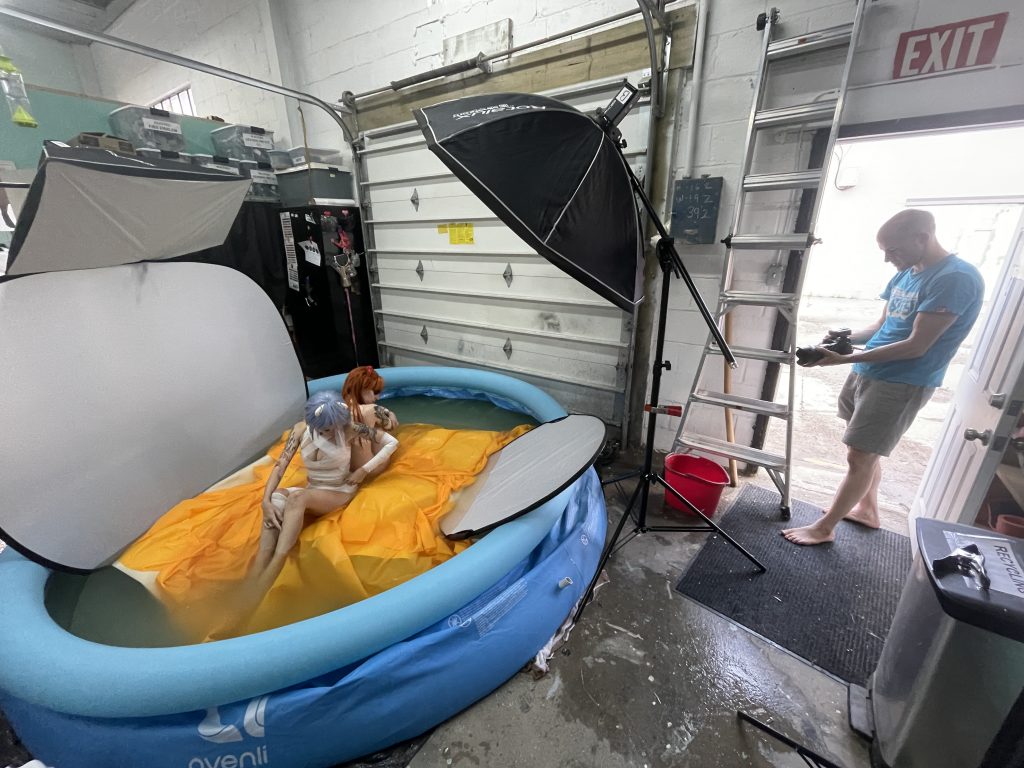
Which is how we wound up with a $200 kiddie pool, which we set up in the Dangerous Ladies studio this past weekend, to take some pool shots!
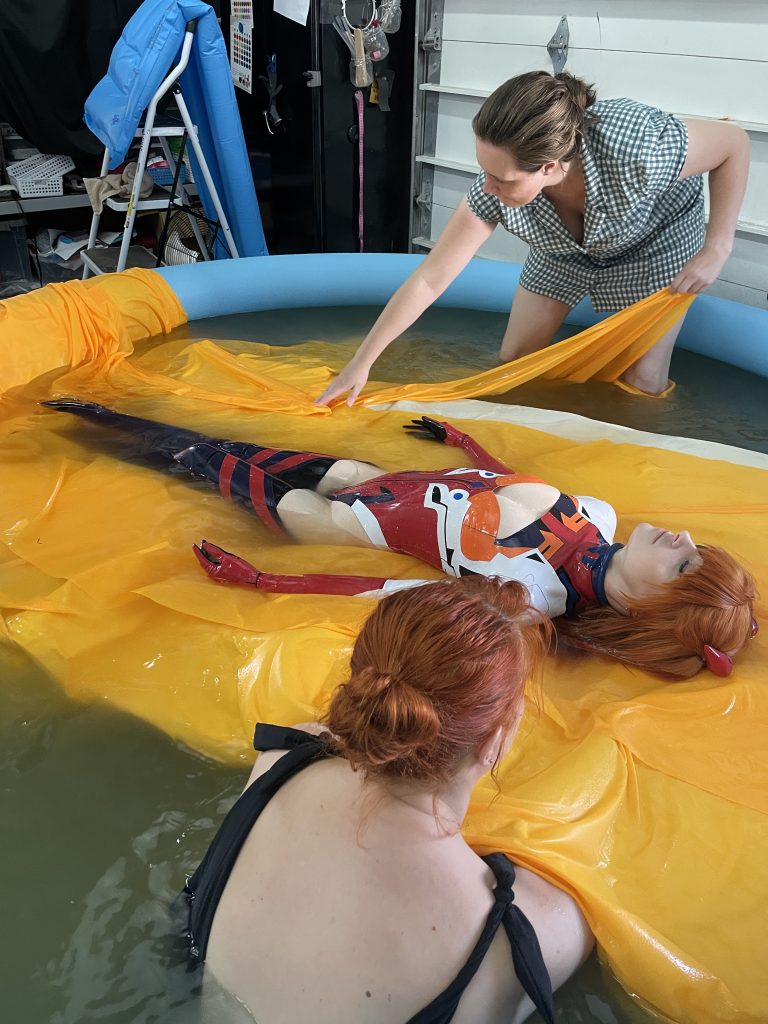
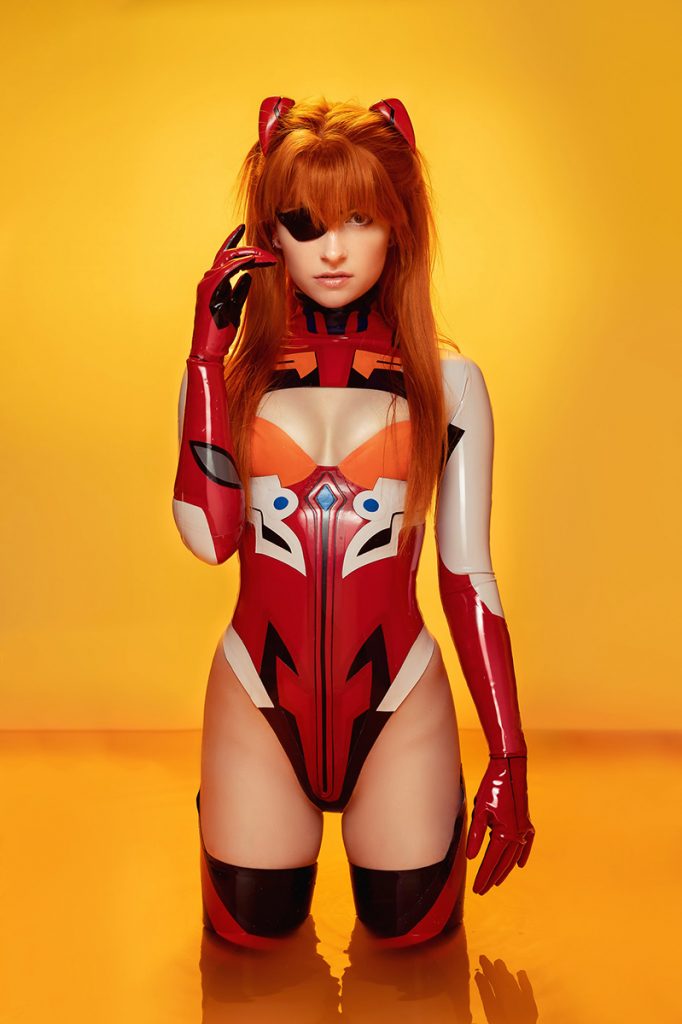
(For anyone who’s interested, I’m dressed as Asuka from Evangelion 3.33, and the yellow/orange fabric is to mimic LCL, which is a breathable liquid in the anime they put the mech pilots in! It shows pretty yellow on my behind the scenes shot, but it was much more orange on camera.)
We bought an inflatable pool, and filled it the old fashioned way, with a garden hose. As you can see on Jenn, above, the pool is more or less knee-deep, or bust-deep-ish if you’re kneeling.
We had, essentially, two photoshoot setups: the top-down one, to take “floating” photos from above:
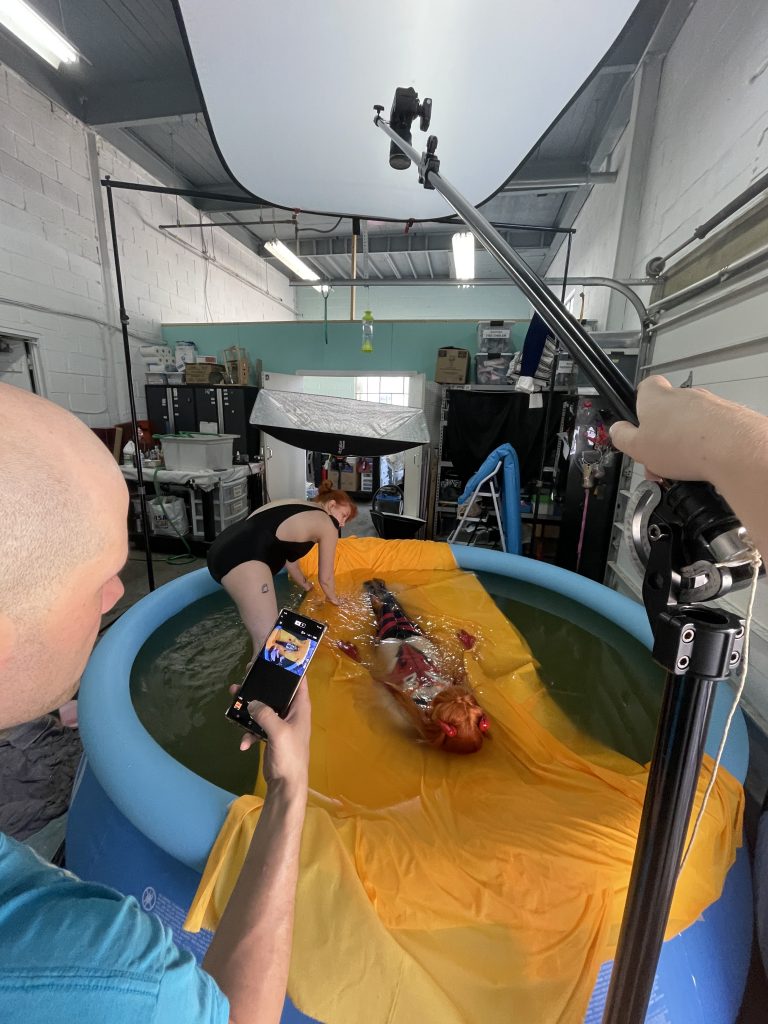
Here you can see the camera and lighting setup; the camera is on the boom directly above me, and Paul has it bluetooth’d to his phone to activate the shutter, which also activates the flash, which is bouncing off of the reflector you can see rigged up above the camera.
Giving us something like this:
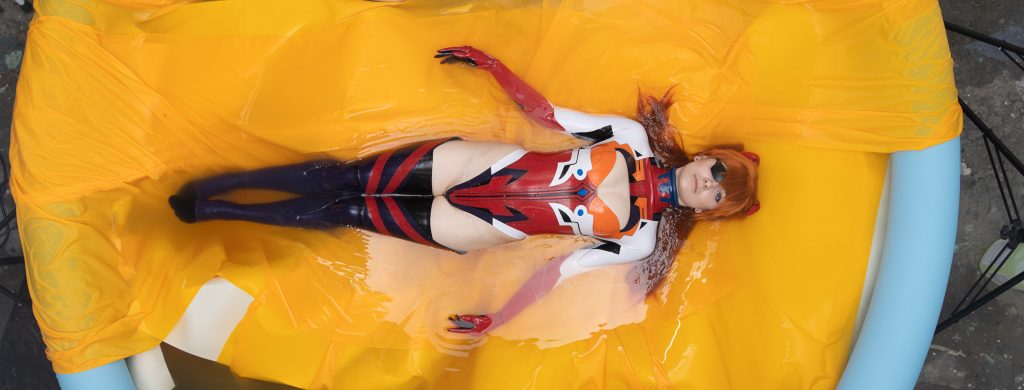
(Not pictured: Jenn and Christine quite literally helping to hold me up with their knees, because I do not float. 😂)
Which, when appropriately photoshopped, gives you something like this:
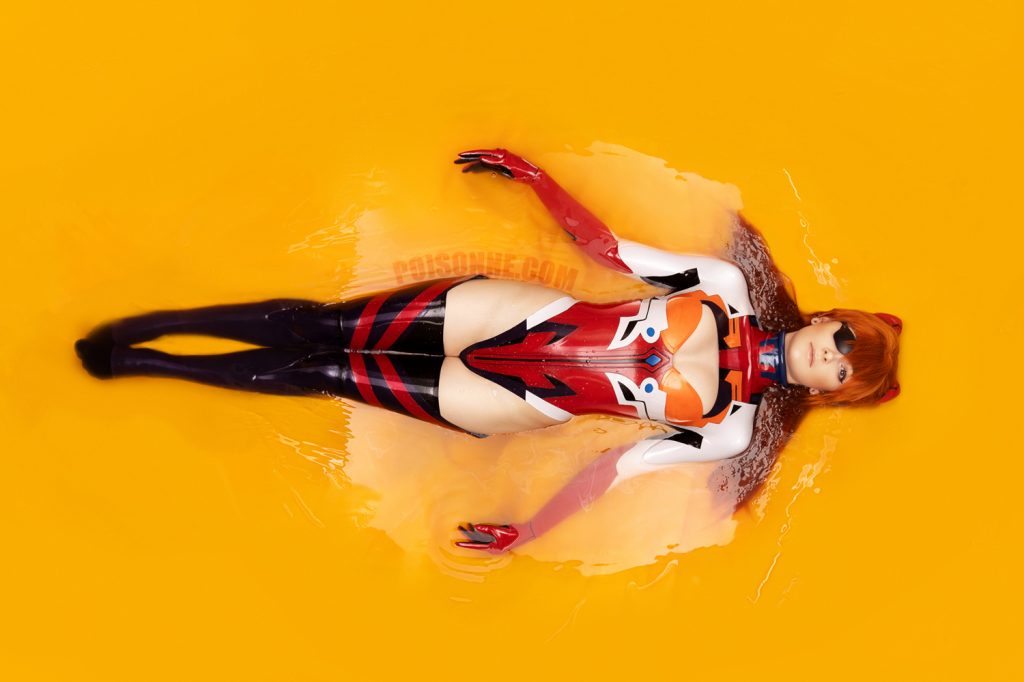
Now, we shot a number of different looks this weekend — this LCL shot. Some regular water shots. And some black-water shots. Let’s start with the “regular” water shots —
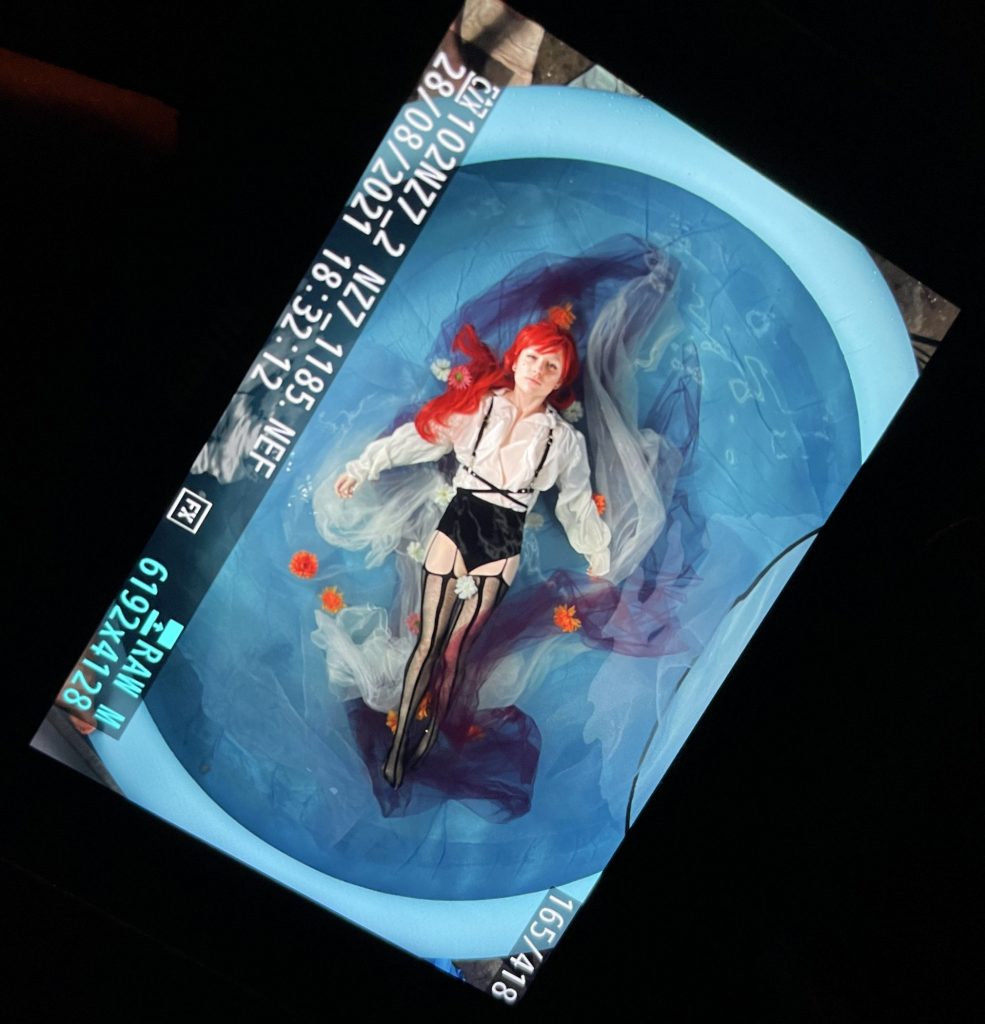
Hopefully Paul doesn’t mind that I’ve posted this back of camera shot, to give you an idea of what we were going for!
As you can tell, the bottom of the pool is blue, which was great for a lot of what we were doing. For this shot, we just added some soft tulle netting (the white) and organza (the purple) and pulled them where we wanted them. The fabrics would settle eventually, if you left them alone, but they behaved really well in the water!
We also had a bunch of flowers, which sank, but sat nicely on the semi-buoyant fabrics! And since the water was clear, it was okay from the top-down if they sank a bit.
What we did next was take a heavy black fabric, and press it down into the bottom of the pool, for the dark water — as illustrated here, with Paul shooting Christine —
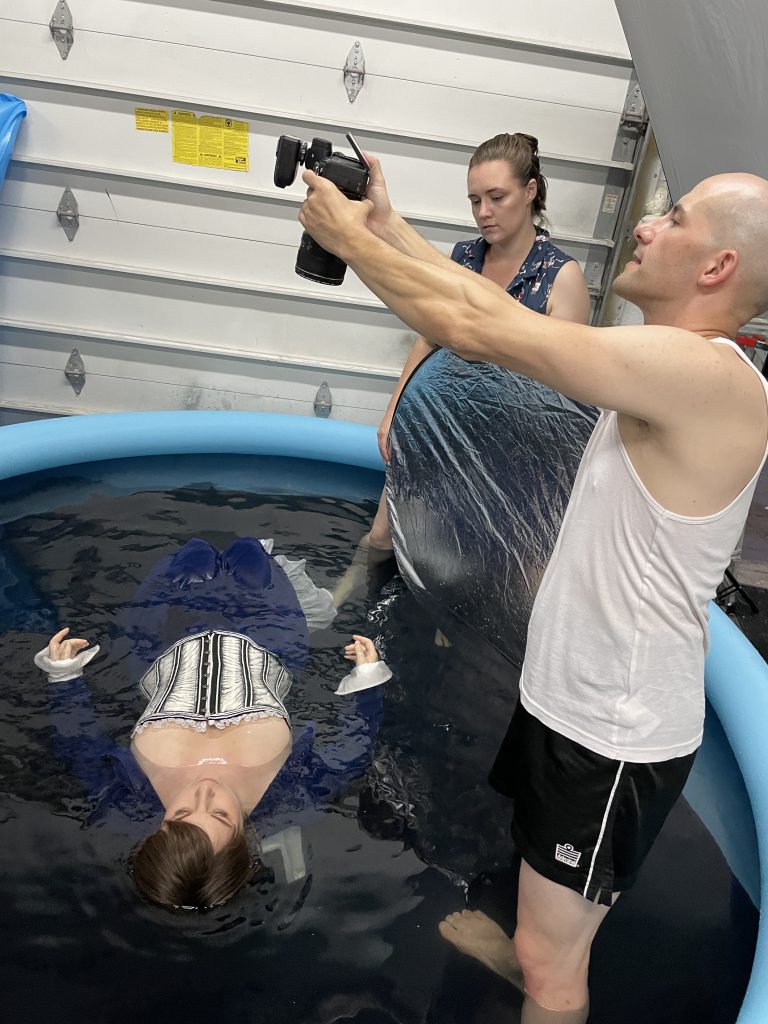
In a much chiller manner, you will note; he was shooting portraits, so he could just hold the camera in the right place.
The trick with getting fabric to stay on the bottom of the pool is to get fabric that’s heavy but not waterproof; you want the fabric to get waterlogged and sink! Heavy cottons are great for this — we were using mystery fabric that was left over from something or other, I think it was originally used for curtains. For the next time we get the pool out, we’re gonna have this black backdrop, and a white one, to be able to give the pool the proper base colour for whatever else we’re doing.
If you look under Christine’s shoulder in the above photo, you might notice something else — a small, white step stool. This was integral to keeping people (me especially, because I don’t float very well) in the right area of the pool, and floating. There’s a few things to keep in mind, wearing cosplay in a pool — your clothes are likely going to be heavy, and so is your wig. I’m writing this two days later, and my neck is still sore from holding my head up with a wet wig. On the second day, Christine wound up supporting my head with her knees while I had Asuka’s wig on, because otherwise the strain of holding the wig up was on my face.
So we’ll also be getting more step stools in varying heights, and we’ve been talking about getting or building a small table that could be raised or lowered to the appropriate depth, to make modelling in the water a lot easier for the people in the pool!
Anyway, this brings us to: making the water LCL coloured.
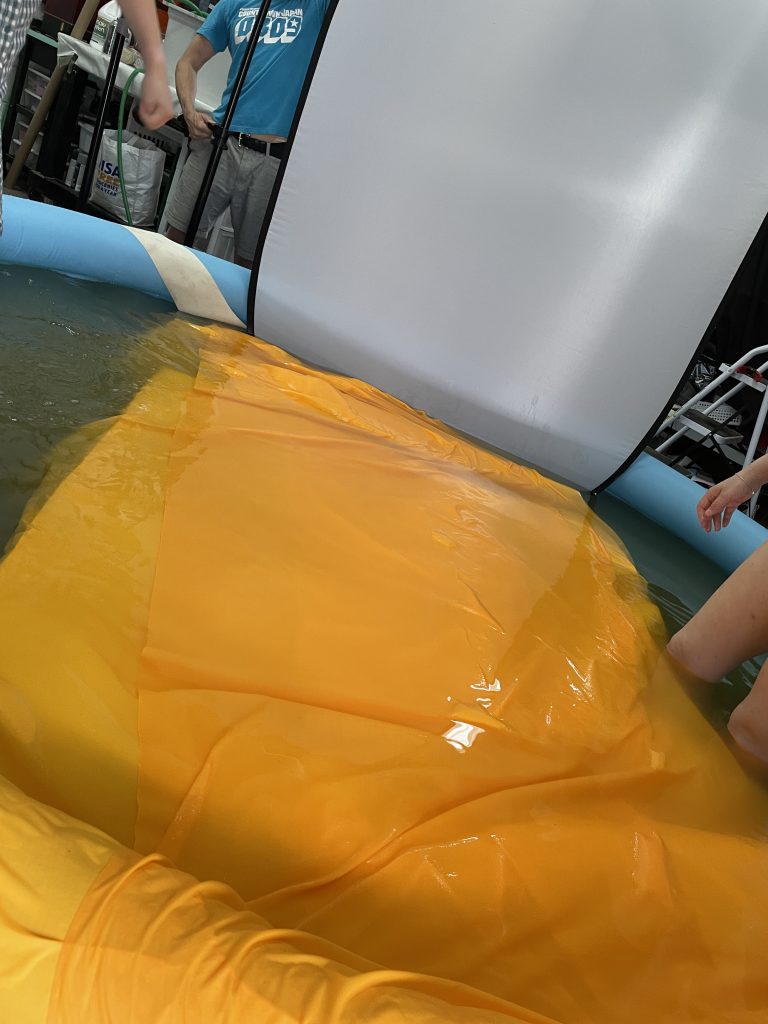
Now, anyone who’s done colour theory might remember that blue and yellow will make green, which is not what we wanted — LCL is a bright yellow/orange. So there’s an intermediary layer of white floating immediately beneath the fabric — and I say floating, because the white we had was Marine Vinyl, which is a waterproof vinyl usually used for things like boat covers. And it does not sink, at least not on its own.
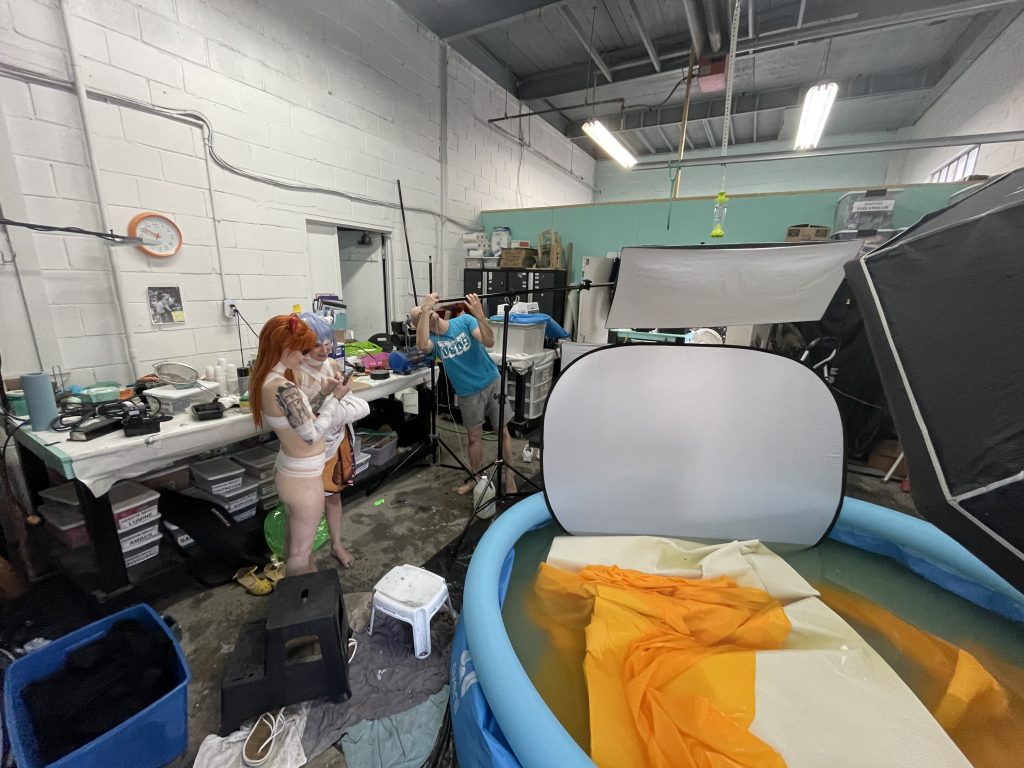
In this case, that was fine, because we had also made the water cloudy, using a bag of non-sugar, dairy-free coffee whitening powder. (An aside — if you’re making a milk bath for photos, it’s very important that you use something sugar free, because you don’t want your genitals or mucous membranes to be sitting in sugar! I also prefer for it to be dairy-free because milk at room temperature tends to smell, and I don’t want my costume to smell like that.) We wanted to cover the fact that we were kneeling in relatively shallow water on camera, which is much harder to do with clear water — we wanted the LCL to appear deep, and not be able to see the stool/the fact that anyone was kneeling/hopefully some of the wrinkles in the fabric, haha.
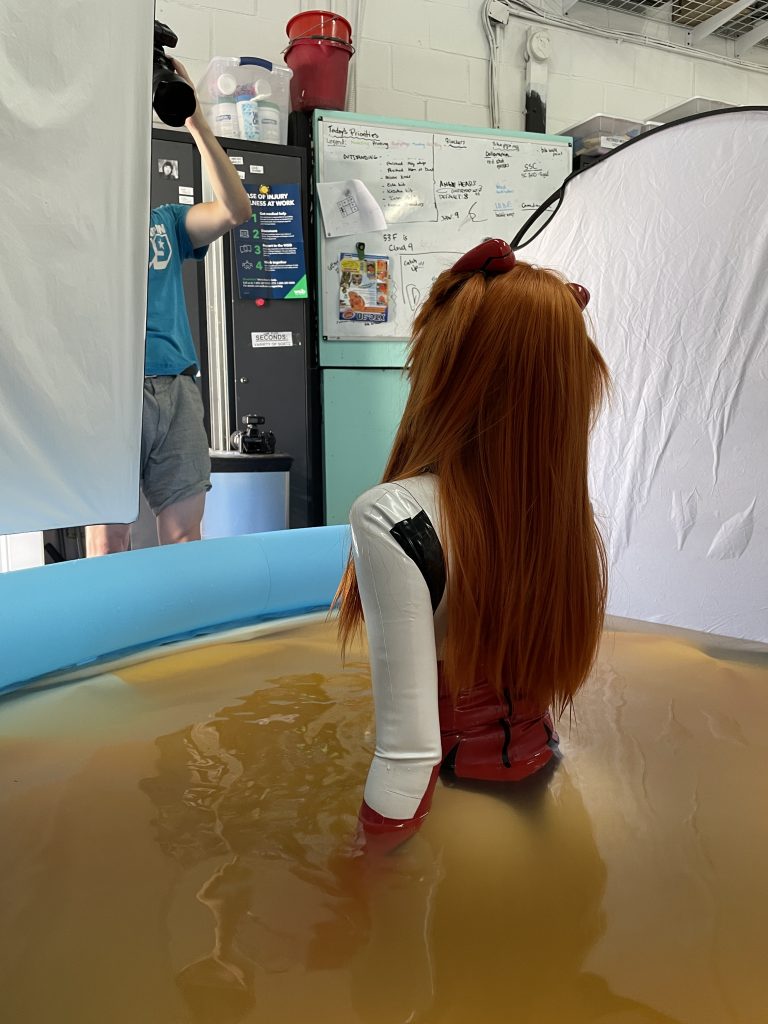
This worked great — you can tell how cloudy the water is, here, even though I’m kneeling on our little step-stool, you can’t tell where my legs are going at all!
While I’m talking about this, I’m also going to show you Paul’s secondary setup, which he’s using in the above photo —
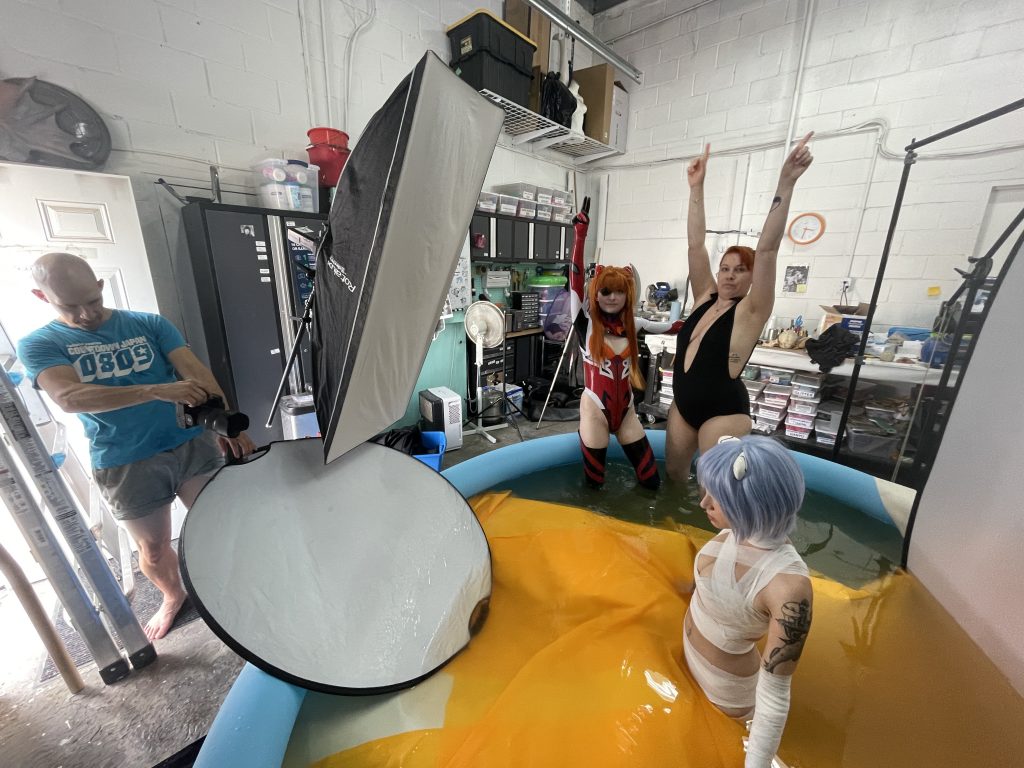
This is: one soft box lighting the large reflector behind with an orange gel, one straight flash in the front with the other reflector to mitigate shadows, and Christine and I being complete idiots while Tam shoots. 😂
We found that the main thing you really wanted from the side, was the fabric being as smooth as possible, and not disturbing the surface of the water. You’ll get a better reflection of the person if the fabric is deeper, but more colour if the fabric is closer to the surface, so you’ll have to play with things to get the sort of look you want.
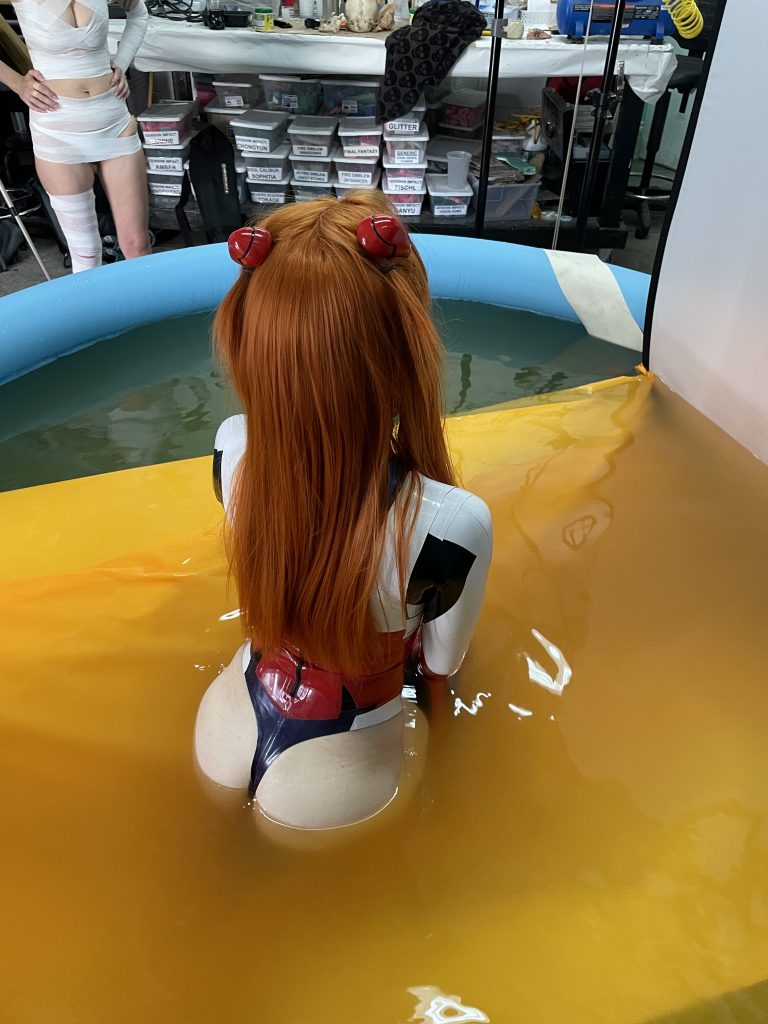
Here you can see me kneeling on top of the fabric, which is on top of the stool so it doesn’t go TOO far — the cloudiness of the water hides most of the wrinkling in the fabric.
Here’s another thing to think about for pool shoots: how warm is the water going to be?
We’re in the middle of a heat wave here, so we assumed the water would warm up — and that didn’t happen. So the water was freezing cold, and we were in and out shooting things for 8 hours a day. Most everyone else had a better time with it than I did, to be honest; I’m a baby when it comes to cold water, and whenever I got fully in I started shivering really quickly. We’ve decided to buy a floating pool heater and rig it with ropes so that it sits in the middle — especially important since we’re planning another shoot in the fall for Halloween!
We also let the majority of the water out and shot some things like that as well — it didn’t work as well for a lot of things, because the fabric sits better in deeper water.
As you can see here. Much easier on us models though, haha.
So there’s a basic rundown of our first pool shoots! Hopefully, if you were thinking of trying something like this yourself, this makes it seem a little less difficult! You can learn from our errors. 😂


4 Comments
Thank you for this! I find the behind-the-scenes stuff fascinating!
I kind of enjoyed writing about it, maybe I’ll do it a little more often!
This is SUCH a fun update, I ate everything up. The BTS shots were so insightful as a photog, and incredibly fascinating! Thank you for such a thorough explanation, I had a lot of fun reading!
I’m glad the behind the scenes photos of the setup made sense! I wasn’t thinking of capturing the whole setup while I was there — this time, anyway, I might do a little more next time, we’re gonna shoot more pool stuff in October. So I’m glad they worked.